
Disclosure: This guide is written by the team behind Stencil My Tattoo. It uses an existing flower example from our website.
To turn a flower photo into a tattoo design, choose a clear image, select a style, and compare the result with the original. The useful question is not just whether the output looks attractive. It is whether it keeps the shape you care about and gives your tattoo artist a clear starting point.
Below, we compare a red poppy photograph with the fine-line design example shown on our Image to Tattoo page. The comparison shows what to keep, what can change, and what still needs review.
Do you need a tattoo design or a stencil?
If you want to reinterpret a photograph as a tattoo concept, start with Image to Tattoo. The output is a design reference you can compare and discuss with your artist.
If you already have the artwork you want and mainly need a linework reference, start with the Tattoo Stencil Maker. A design reference and a transfer stencil serve different purposes. Neither an attractive design nor a clear outline removes the need for your artist to check the final artwork.
1. Choose a flower photo with a clear shape
Our example starts with a close-up photograph of a red poppy. The flower fills most of the frame, its petal edges are visible, and the plain background separates the bloom from its surroundings.
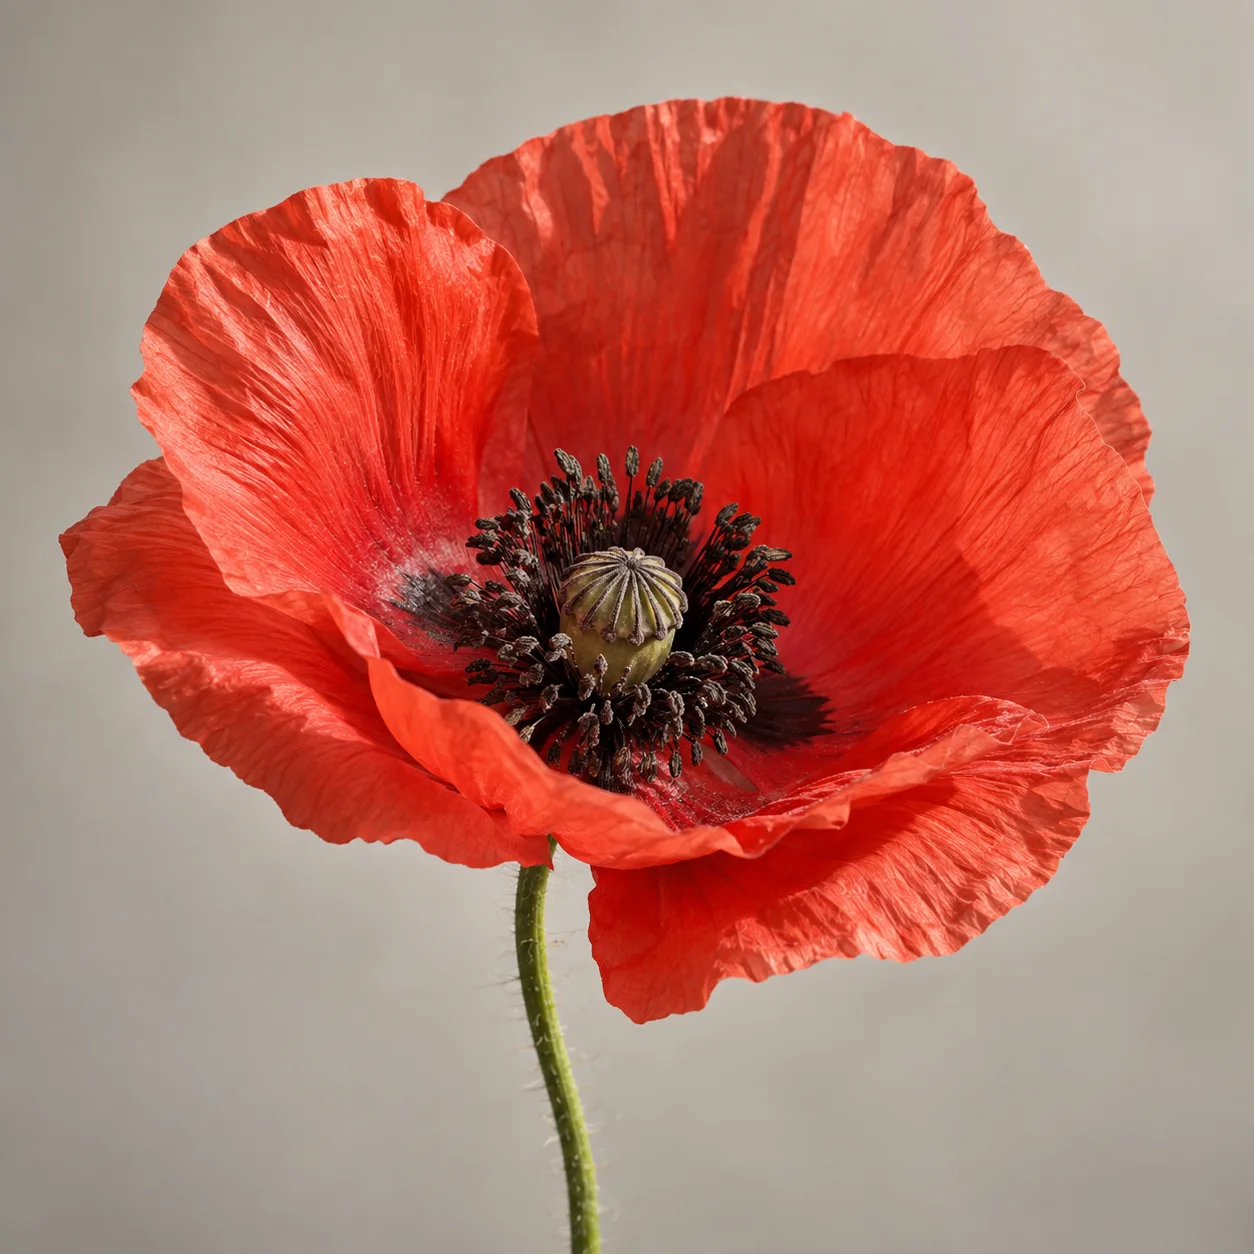
Source example: a red poppy photograph already used on the Image to Tattoo page.
Before uploading your own photo:
-
Choose one main flower or a small arrangement with clearly separated shapes.
-
Crop away unrelated objects, while keeping the petals and stem you want in the design.
-
Use a sharp image with visible edges. Avoid glare or blur that hides important features.
-
Decide what matters to you: the silhouette, the center, the stem, or the flower's color.
-
Use a photograph you own or have permission to use.
Our poppy has a simple outer shape but a detailed center and many fine petal folds. That combination makes it useful for checking how much texture a design keeps.
2. Choose a style and a level of detail
Open Image to Tattoo and upload a JPG, PNG, or WebP file up to 10 MB. Choose a tattoo style and a detail level before generating.
Fine-line is a useful starting direction when you want delicate contours and open space. Blackwork is another direction when you prefer strong dark shapes. Traditional offers a bolder outline and a limited color direction. These choices change the visual treatment; they do not guarantee an exact copy of every petal.
The tool offers Simple, Balanced, and Detailed settings. For a first attempt, Balanced is a reasonable starting point. Compare the result before trying another setting. Simple asks for the main shape; Detailed asks for more source information. More detail is not automatically more useful for your intended tattoo.
Example note: The images in this guide are existing website assets, not a new generation session recorded for this article. We have not verified the exact detail setting or number of attempts behind this particular design. The settings above describe a suggested workflow, not the settings proven to produce the example below.
3. Compare the design with the original
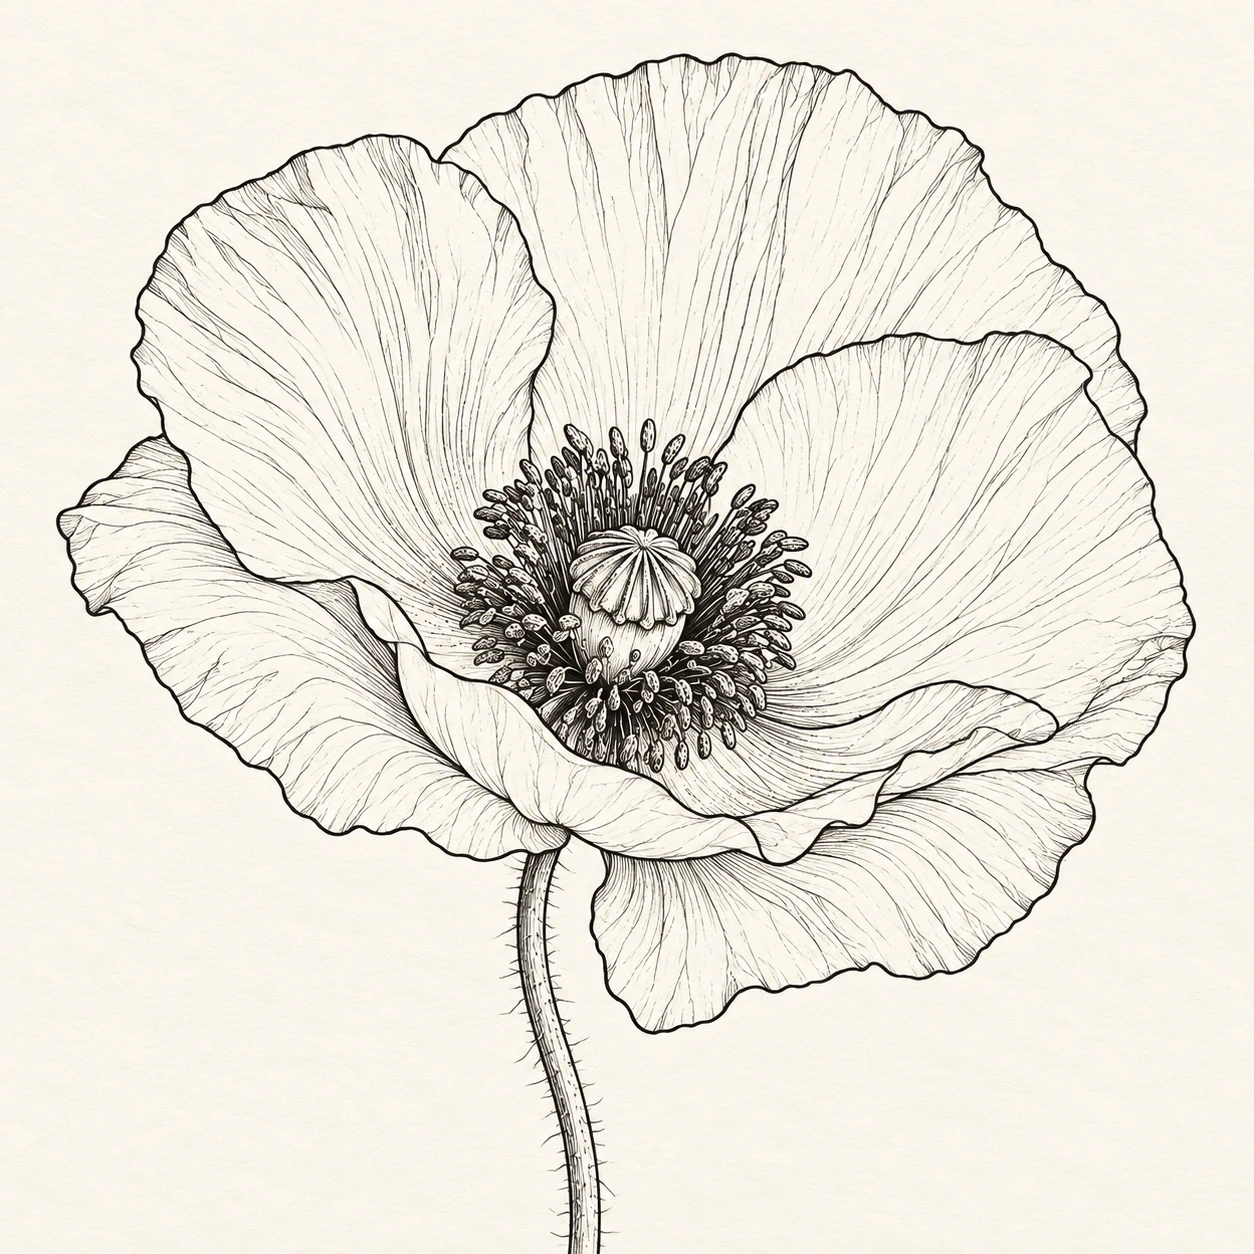
Design example: the fine-line poppy reference already shown on our website. It is not a guaranteed one-attempt result.
The broad flower silhouette, overlapping petals, central seed pod, and slender stem remain recognizable. The red petals are represented through black contours and fine interior lines. The background becomes a light field rather than the original photographic surroundings.
This gives you a concrete choice to discuss with your artist: keep the flower's shape while changing how its color and texture are expressed.
4. Check what still needs work
The example also has limitations. Its center contains many closely spaced marks, and numerous thin lines describe the petal folds. The stem retains small hair-like details. It reads as a detailed botanical drawing rather than a very simple outline.
If you want a sparse flower design, this example may keep more texture than you need. Do not assume that the Fine-line label means a minimal design.
-
Shape: Compare the petal outline and overlaps with the source. Check that meaningful features have not changed.
-
Detail: Look at the center and interior lines. Decide which details help identify the flower and which are optional.
-
Orientation: Check the direction of the stem and bloom before discussing placement.
-
Scale: Review the reference at the size you are considering, then ask your artist which lines and spaces need adjustment.
A successful image generation is not the same as a finished tattoo design. Keep the original alongside the output so your artist can see what you intended to preserve.
5. Preview placement and prepare for your appointment
Download the design reference you want to discuss. You can use the Tattoo Simulator to explore approximate position and size on a body photo. A placement preview helps communicate your preference; it does not confirm the final tattoo size or technique.
Bring your artist the original photograph, the design reference, and a short note about the details you want to keep or simplify. Let the artist refine the artwork and prepare the final stencil.
Try the workflow with your own flower photo
Open Image to Tattoo, start with one clear flower, and review the output before generating more versions. Trial credits let you try the tool before buying a one-time credit pack. Check the displayed credit cost before each generation; there is no subscription.
Only upload images you have permission to use. Image to Tattoo sends uploaded images to model providers to generate the result. Uploads and outputs are not listed in a public gallery, but anyone with a direct asset link may be able to access an image. Read our Privacy Policy before uploading personal photographs.